
Good news! According to Statista, in 2021, React.js became the most widely used web framework among software developers. The survey revealed that 40.14% of respondents relied on it.
React.js is a fantastic library for front-end development. No steep learning curve, user-friendly interface and great possibilities - that’s how we can quickly describe React.js. Today we offer you to learn a few useful facts about React and build a small SPA, for which React.js suits just great.

written by:
Olga Shimko
Senior Software Developer, Qulix Systems
Contents
Before We Start: SPA vs MVA
As we’ve already mentioned above, you are going to learn to build SPAs today. Yet before we start, let’s check if you understand properly what an SPA is.
To do this, have a look at the two examples below.
An MPA Lifecycle
“Multi-page applications are the traditional web applications that reload the entire page and display the new one when a user interacts with the web app.” (Dev)
What can be an MPA? Tons of websites are MPAs, and they are pretty good at giving the users the content they ask for and interacting with them. What’s the problem with an MPA then? Why are businesses mad about getting an SPA nowadays?
The problem (if we can say so) is that an MPA does a lot of repetitive tasks to show the users the website contents.
Now we’ll see what it really means.
Nick wants to check if he has a new message from Mike. He goes to the Messages page in his FB account. What does his browser do to get the messages from Mike?
To display a web page, a browser (client) sends a request to the server. The server generates a huge HTML file (and a teeny-tiny JS file) and sends it as a response to the browser. When the browser gets the HTML file it gets down to building a web page using the contents of the HTML file. When the browser is done building, Nick sees the Messages page with a new message from Mike. The whole thing takes milliseconds to happen if the Internet connection is stable, so Nick (and the rest of us) doesn’t really notice the process.
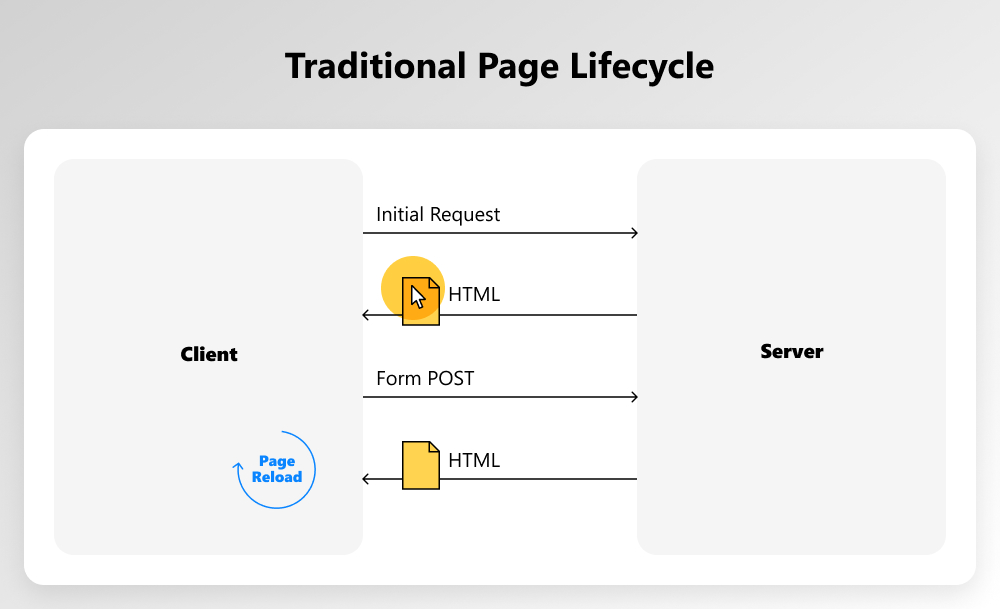
Nick is sitting there, waiting for Mike's message to come… And that’s the bad point about an MPA - Nick has to reload the page to check if there are some new messages, which means the whole process described above repeats. Not that great, hm?
What if FB was an SPA? Oh, that would be a completely different story.
An SPA Lifecycle
Nick is sitting there waiting for Mike’s message to come… And here it comes! And again! Oh my, another message, tons of messages coming one after another, and Nick doesn’t actually have to reload the page, so he doesn’t do it. He is just chatting with his friend Mike and doesn’t give a damn about what’s happening backstage.
And here what happens.
The browser (client) sends a request to the server, and the server gives back a huge JS file with a teeny-tiny HTML file. The client uses these files to build the page. In case it needs an update on new messages, JS sends a request to the server, and the server replies with a lightweight file carrying the new info. Using this, the client refreshes the page without reloading it. The whole process is much simpler and quicker than in the MPA case.
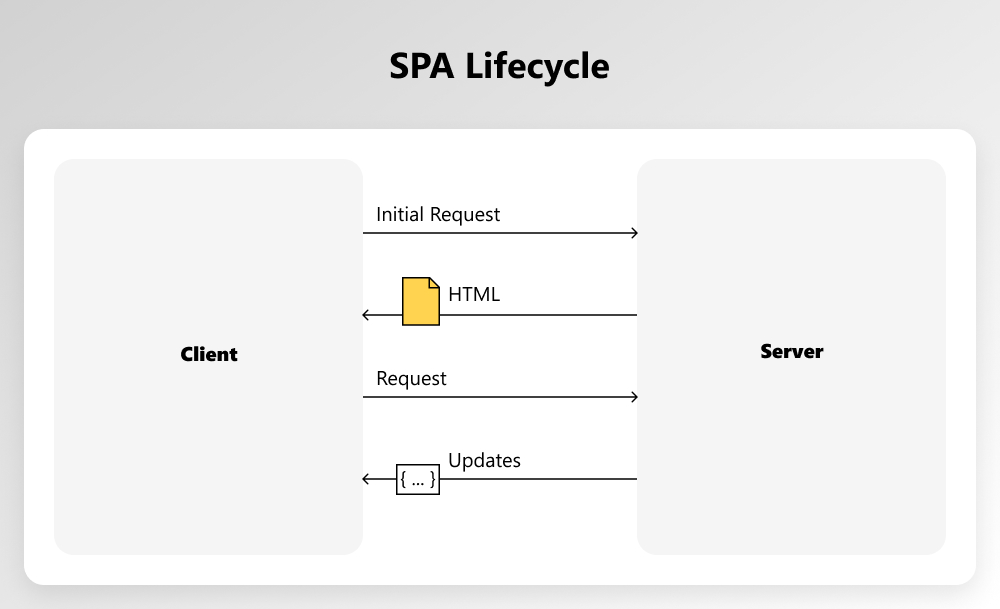
So, let’s sum it up. If Nick wants to see a new message from Mike, his browser makes the corresponding request for an update of a portion of data, not the whole page. The client saves time and resources by updating only a specific page area, while the rest of the page content remains unchanged. What a beautiful magic of an SPA!
FB actually later chose to become an SPA, because a) SPAs are not that resource-intensive for servers; b) FB uses React, which is a great library for single page applications. Too a nice combo to ignore.
Want some more examples of SPAs and MPAs? Here they are:
- SPAs — Gmail, Google Maps, Facebook, GitHub;
- MPAs — eBay and Amazon.
How to Build a Single Page Application in React (Using React Router)
Now as you know the basic difference between a multi-page and a single page application, let’s learn to build SPAs using React.
Getting Ready to Start Building Your SPA Application
So, where do we start?
If you are planning to go by scratch, please don’t do it. The React community has done a lot in advance for you, and very soon you are going to see it.
So to get successfully started with a React SPA project you need to instal a package manager (npm = Node Package Manager). You can download Node package manager at nodejs.org, if you haven’t done that yet.
With the package manager installed, you can make use of the tons of code that developers before you have prewritten and successfully implemented in their SPA applications. Those prewritten pieces of code are essential for the SPA development, as they save you days, if not weeks of work. Once you’ve installed a package manager, you’ll be able to retrieve the modules you need to quickly proceed with your work.
Oh, and remember to learn some HTML and CSS beforehand to be able to produce some decent React-based SPAs. And JavaScript, of course. That should go first, by the way, as React is a JavaScript-based library and knowing JavaScript here makes pretty much sence.
Yeah, now we seem to be finally ready to get our hands dirty with some new project!
SPA Project Start
Start by typing the npx create-react-app projectname command. Create react app is a command line interface tool to easily get up and running and set a boilerplate containing all the necessary files, folders and packages. It also has a development server.
Once you’ve typed the command, create-react-app starts downloading whatever modules you may need from the web using Node package manager. All the downloads will be neatly placed in your project folder.
When create-react-app has finished loading all the components and modules that you might need, you’ll see some starting tips like this:
npm testStarts the test runner.npm run ejectRemove this tool and copies build dependencies, configuration files and scripts into the app directory. If you do this, you can’t go back!We suggest that you begin by typing:cd my firstreatappnpm startHappy hacking!So, everything seems to be properly set now.
Now you want to open this folder in your text editor and type npm start.
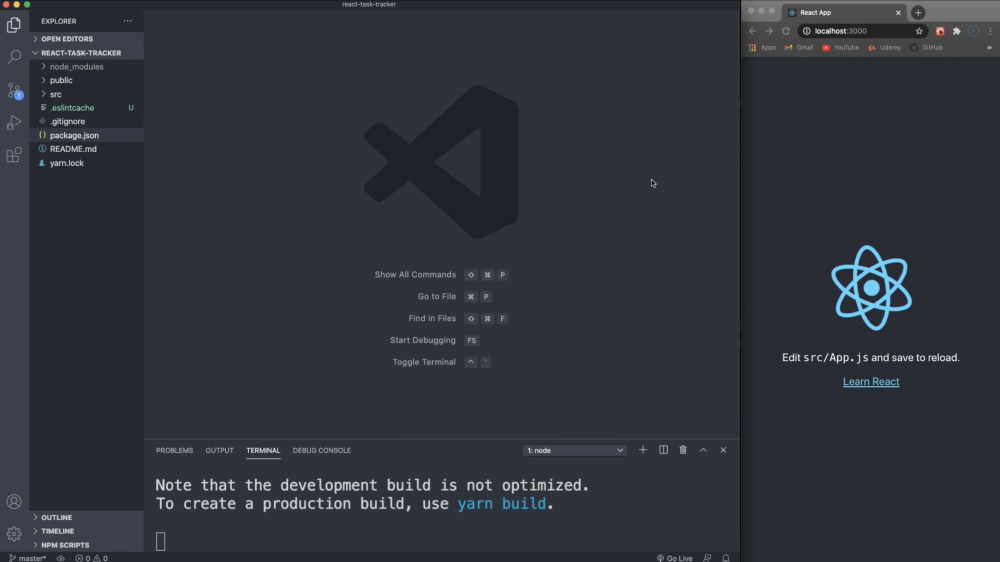
As soon as you type these magic words, the development server starts up on http://localhost:3000. You’ll see this picture with React spinning logo.
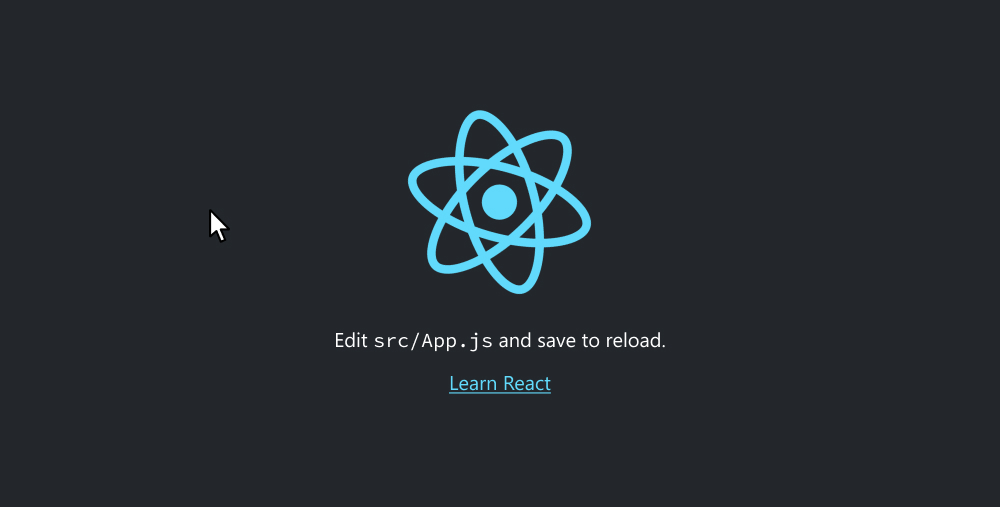
A beautiful thing about React is that all the changes in the root component (App.js) are immediately rendered and displayed in the browser tab. Thus, you can easily monitor your progress and make necessary changes on the go.
We are that close to the active coding part, but for now let’s install some seriously stunning add-on which makes SPA applications what they are.
Ladies and gentlemen, meet ReactRouter.
What Is ReactRouter and Why Do We Need It?
Forget about an SPA for a second. Let’s find 3 things that we love about navigating along the MPA pages.
First, what a user sees on the page is reflected in the URL. ‘About’ page has a URL with ‘About’ in it, ‘Home’ page URL will have ‘Home’ in it, etc. So, the user is always correctly informed about his/her location.
Second, a user’s browser history will contain all the specific addresses of the pages that the user visited. You don’t have to go back to the website and look for that exact page again.
Third, a user can use back and forward buttons to easily switch between the webpages and — oh, lord! — they respond properly!
All those properties of an MPA should migrate safely to your SPA. What’s more, in an SPA the pages shouldn’t reload, remember? Have a look at a couple of examples we found for you (here and here) to see how it works live.
How are we going to make something similar? Using React.Router, of course!
In your terminal window type
npm i react-router-domafter which all the ReactRouter files will be copied and registered in the package.json folder. Now you’re equipped with the tools that’ll help you do all the SPA routing job.
By the way, package.json shows what dependencies are needed to run your SPA. If you have a look at all the stuff that lies there, you’ll see what a great job create-react-app has done for you.
"dependencies": {"@testing-library/jest-dom": "^5.11.4","@testing-library/react": "^11.1.0","@testing-library/user-event": "^12.1.10","react": "^17.0.2","react-dom": "^17.0.2","react-router-dom": "^5.2.0","react-scripts": "4.0.3","web-vitals": "^1.0.1"},"scripts": {"start": "react-scripts start","build": "react-scripts build","test": "react-scripts test","eject": "react-scripts eject"},
"eslintConfig": {"extends": ["react-app","react-app/jest"]},"browserslist": {"production": [">0.2%","not dead","not op_mini all"},"development": ["last 1 chrome version",">"last 1 firefox version","last 1 safari version"]},If you would like to go from scratch, you would need to pick all those files by hand and put them in your file directory instructions to launch your application.
Furthermore, create-react-app has also taken care of the application structure for us. Everything looks neat and clean.
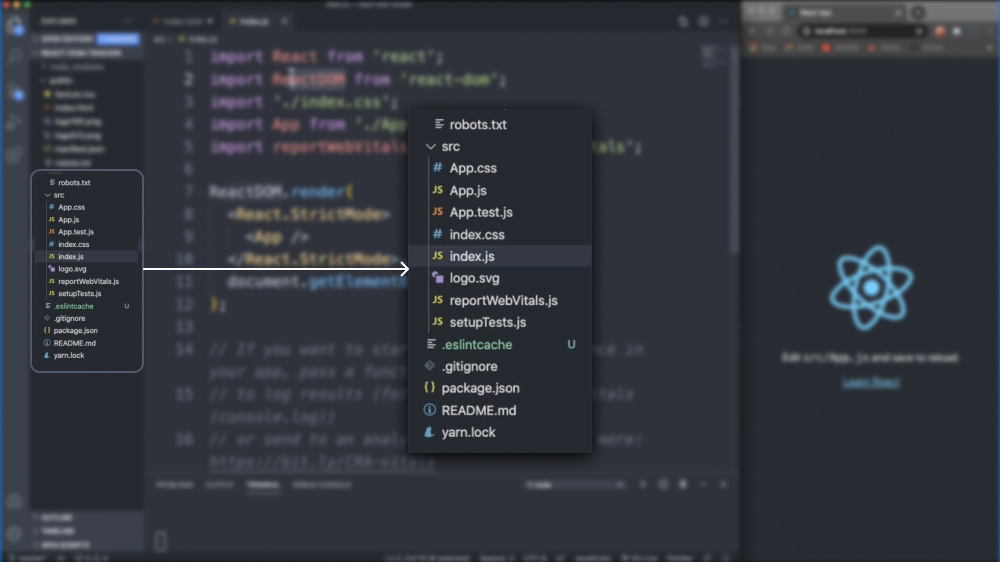
Most of this stuff won’t be visible to the users of your app. To enable this React uses the webpack to transform the directories and files into static assets, which your app users see.
It’s okay not to give a damn about what’s going on with the webpack. If you’re too curious, you’re welcome to check out this. To cut it short, create-react-app removes you from the groundwork and does all the configuration for webpack so that you could start coding just that simple.
Building Your First Single Page Application
Now as we’ve loaded all the necessary dependencies, we are ready to start coding. You have your qulix-test-app (or whatever name of your choice) folder open in your text editor of choice aaaand off we go!
If you have experience creating an MPA, at the start you’ll do nothing different to what you’ve done before.
In your public folder you’ll see an index.html file. Here locates a gateway to your application UI.
<div id="root"></div>Remove all the irrelevant stuff from here and add the html you need into it:
<!DOCTYPE html><html lang="en"> <head> <meta charset="utf-8"> <meta name="viewport"<content="width=device-width, initial-scale=1"> <meta name="theme-color"<content="#000000"> <meta name="description" content=Web site created using create-react-app" > <link rel="apple-touch-icon" href="%PUBLIC_URL%/logo192.png" /> <!-- manifest.json provides metadata used when your web app is installed on a user's mobile device or desktop. See https://developers.google.com/web/fundamentals/web-app-manifest/ --> <link rel="manifest" href="%PUBLIC_URL%/manifest.json" /> <!-- Notice the use of %PUBLIC_URL% in the tags above. It will be replaced with the URL of the `public` folder during the build. Only files inside the `public` folder can be referenced from the HTML. Unlike "/favicon.ico" or "favicon.ico", "%PUBLIC_URL%/favicon.ico" will work correctly both with client-side routing and a non-root public URL. Learn how to configure a non-root public URL by running `npm run build`. --> <title>React App</title> </head> <body> <noscript>You need to enable JavaScript to run this app.</noscript> <div id="root"></div> <!-- This HTML file is a template. If you open it directly in the browser, you will see an empty page. You can add webfonts, meta tags, or analytics to this file. The build step will place the bundled scripts into the <body> tag. To begin the development, run `npm start` or `yarn start`. To create a production bundle, use `npm run build` or `yarn build`. --> </body></html>Right now you can also check out index.css with some styles already prepared for you. If you aren’t going to use those styles, just remove the code and paste here some ready-made styles or come up with your own. Also, you can do all the styling after you’re done with the code. It's really up to you.
html, body, #root { height: 100%; min-width: 1024px; } body { margin: 0; padding: 0; font-family: Regular PT Sans, sans-serif !important; } @font-face { font-family: 'Bold PT Sans'; } @font-face { font-family: 'Regular PT Sans'; } form { margin-bottom: 50px; } .form-group { margin-bottom: 30px; }Index.js will serve as an entry point for React.
Nothing exceptionally new so far, isn’t it?
Next go to the App.js. Insert the following code there.
import './App.css';import SimpleRouter from "./containers/SimpleRouter";import AppRouter from "./containers/AppRouter";function App() { return <div className="App"> <AppRouter/> </div>);}export default App;AppRouter.js is our proprietary component that will help us do the routing job.
Our SPA will have a header (Qulix SPA application) and three components (a Dashboard, List and a Form), i.e. individual pages that you are going to switch between without reloading your webpage. Actually, a UI of an SPA application is nothing more than a bunch of components, so be ready to build lots of that stuff.
Hm, what else should you know about the SPA structure?
Well, it's important that you remember to distinguish between your static and dynamic parts of the pages. Say, your SPA will definitely have a header and maybe a footer which are static components (app frame). Anything in between will be the dynamic part of your application.
Let’s code this down!
Start from creating a components folder for 3 corresponding components in the src folder to keep your components organized.
Create a few more files corresponding to your links names (DashboardComponent.js, ListComponent.js, FormComponent.js.
Next thing you want to do is create a new folder for your containers and create a new file in it - AppRouter.js. Our application structure should look like this by now:
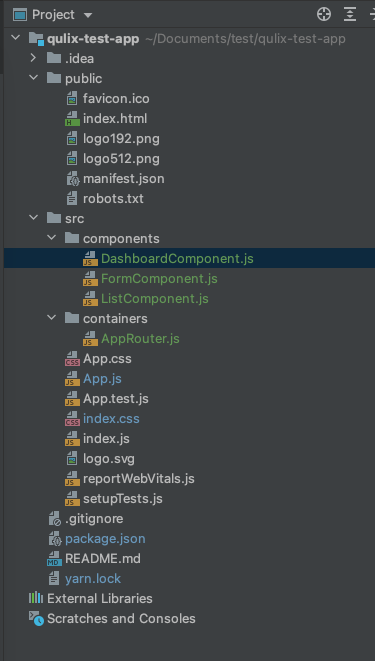
Great job!
Now let’s specify what our components should look like.
import React, { Component } from "react";class DashboardComponent extends Component { render() { return ( <div> <h2>DASHBOARD</h2> </div> ); }}export default DashboardComponent;import React, { Component } from "react";class ListComponent extends Component { render() { return ( <div> <h2>List</h2> rhoncus eget sapien:</p> <ol> <li>Nulla pulvinar diam</li> <li>Facilisis bibendum</li> <li>Vestibulum vulputate</li> <li>Eget erat</li> <li>Id porttitor</li> </ol> </div> ); }}export default ListComponent;import React, { Component } from "react";class FormComponent extends Component { render() { return ( <div> <h2>Form</h2> <form> <label> Name: <input type="text" name="name" /> </label> <input type="submit" value="Send" /> </form> </div> ); }}export default FormComponent;Very well done! We have all the components required. All that we have to do to have our first SPA up and running is to tie them together into a single whole! We’ll do this using React Router.
Working with React Router Dom
First thing first, let’s determine the components we want to switch between. In our case, these are DashboardComponent.js, ListComponent.js, FormComponent.js and we want them imported into our AppRouter.js. By the way, you can have as many components as you’d like, it all depends on your application.
Move to AppRouter.js and in here insert the following code:
import React, { Component } from "react";import { Route, NavLink, HashRouter} from "react-router-dom";import DashboardComponent from "../components/DashboardComponent";import ListComponent from "../components/ListComponent";import FormComponent from "../components/FormComponent";class AppRouter extends Component { render() { return ( <HashRouter> <div> <h1>Qulix SPA application</h1> <ul className="header"> <li><NavLink to="/">Dashboard</NavLink></li> <li><NavLink to="/list">List</NavLink></li> <li><NavLink to="/form">Simple form</NavLink></li> </ul> <div className="content"> <Route path="/" component={DashboardComponent}/> <Route path="/list" component={ListComponent}/> <Route path="/form" component={FormComponent}/> </div> </div> </HashRouter> ); }}export default AppRouter;As you can see, we have pulled some of the files from react router dom into our code. These files will help us do the SPA navigation.
The foundation for navigation and browser history (which together comprises routing) is laid by HashRouter.
NavLink component helps us with the specialized navigation links.
The Route component matches the navigation links with the URLs.
All right, we have all our components in place and properly linked. But there’s still some more work to be done.
If you npm start your application now, you’ll see that our SPA still shows some irrelevant content all the time.

To fix that we’ll do the following trick. Add the exact property as shown below and that will be it!
import React, { Component } from "react";import { Route, NavLink, HashRouter} from "react-router-dom";import DashboardComponent from "../components/DashboardComponent";import ListComponent from "../components/ListComponent";import FormComponent from "../components/FormComponent";class AppRouter extends Component { render() { return ( <HashRouter> <div> <h1>Qulix SPA application</h1> <ul className="header"> <li><NavLink to="/">Dashboard</NavLink></li> <li><NavLink to="/list">List</NavLink></li> <li><NavLink to="/form">Simple form</NavLink></li> </ul> <div className="content"> <Route path="/" component={DashboardComponent}/> <Route path="/list" component={ListComponent}/> <Route path="/form" component={FormComponent}/> </div> </div> </HashRouter> ); }}export default AppRouter;The reason for this bug was in the matching character in all the paths (/). As long as there is no specific instruction to distinguish between these links, React renders them all similarly. Now as we have our exact property in place, React shows the exact match.
Save it up and have a look at your browser tab. We’re done now! Hoooraaaay!
Just to make sure we’ve done everything right, let’s check out all the pages of our SPA. They should look like this:
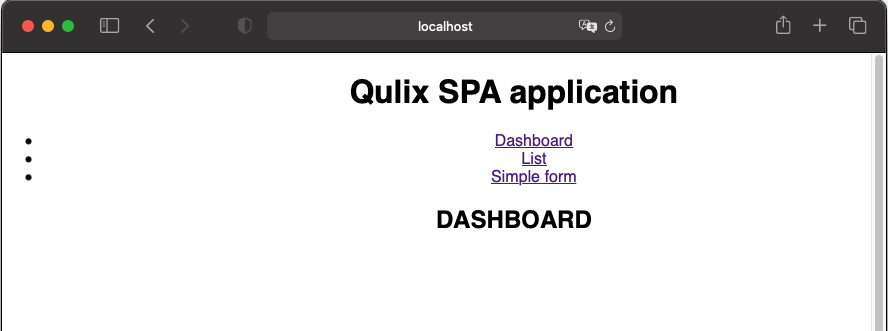
(click Dashboard to see this page)

(click List to see this page)
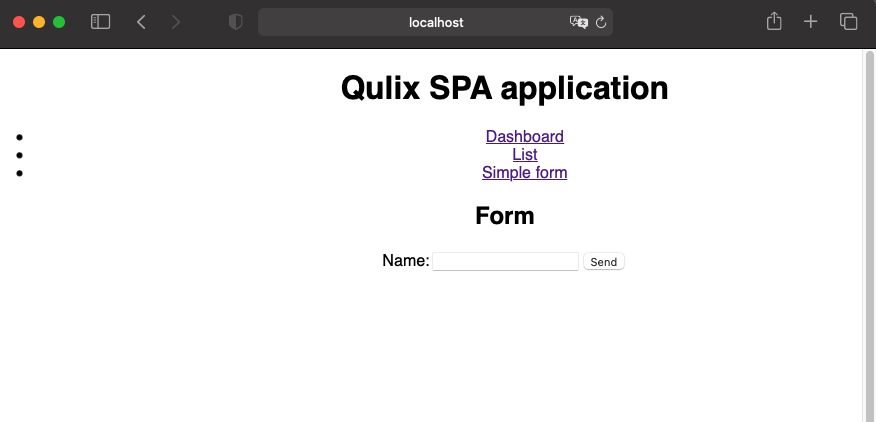
(click Simple form to see this page)
Now you have your first SPA ready.
Conclusion
That’s it, guys! This was a pretty long read to read, but you’ve managed to get through it successfully! Thank you for that.
Now you know the difference between an MPA and SPA, how to build an SPA using React and have mastered ReactRouter, which is very impressive.
Mind, please, that here we’ve described how to build a VERY simple single page application using React. No big deal, as you see. A great chunk of work has been done for us by the React community, which is continuing to simplify the developers’ lives by adding valuable extensions and upgrading React in time.
What else to say?
Take your time practicing React (and React Router in particular) and very soon you’ll be able to create far more than that! Actually, routing is the toughest thing about single page applications. Be patient and persistent, give react router dom a few tries and you’ll definitely succeed.
Share your work results in the comments, we’ll be happy to hear from you!
Last but not least. Whether SPAs are here to stay for long and make MPAs a thing of the past we are yet to see. However, if the next five years will see the demand for SPAs, that’s definitely for long as things change so fast in the IT world! Which means React is definitely a great option to get your hands on!
Without a doubt, investing some time and efforts into learning to build SPAs using React and specifically React Router will pay off. In 2021, it is as easy as never before! Get some great free tutorials on youtube, for example, as there are so many of them out there. We think this one is super cool.
Good luck and never stop looking for new things to master!
Qulix Systems has tons of experience in custom application development using React and other software development libraries and frameworks. For more on React or SPA/MPA stay on our blog.

Contacts
Feel free to get in touch with us! Use this contact form for an ASAP response.
Call us at +44 151 528 8015
E-mail us at request@qulix.com


Feel free to get in touch with us! Use this contact form for an ASAP response.
Call us at +44 151 528 8015
E-mail us at request@qulix.com
![]()
![]()
![]()